Showing posts with label Breakfast. Show all posts

Thursday, April 8, 2021

AS YOU LIKE IT - BREAKFAST STRATA

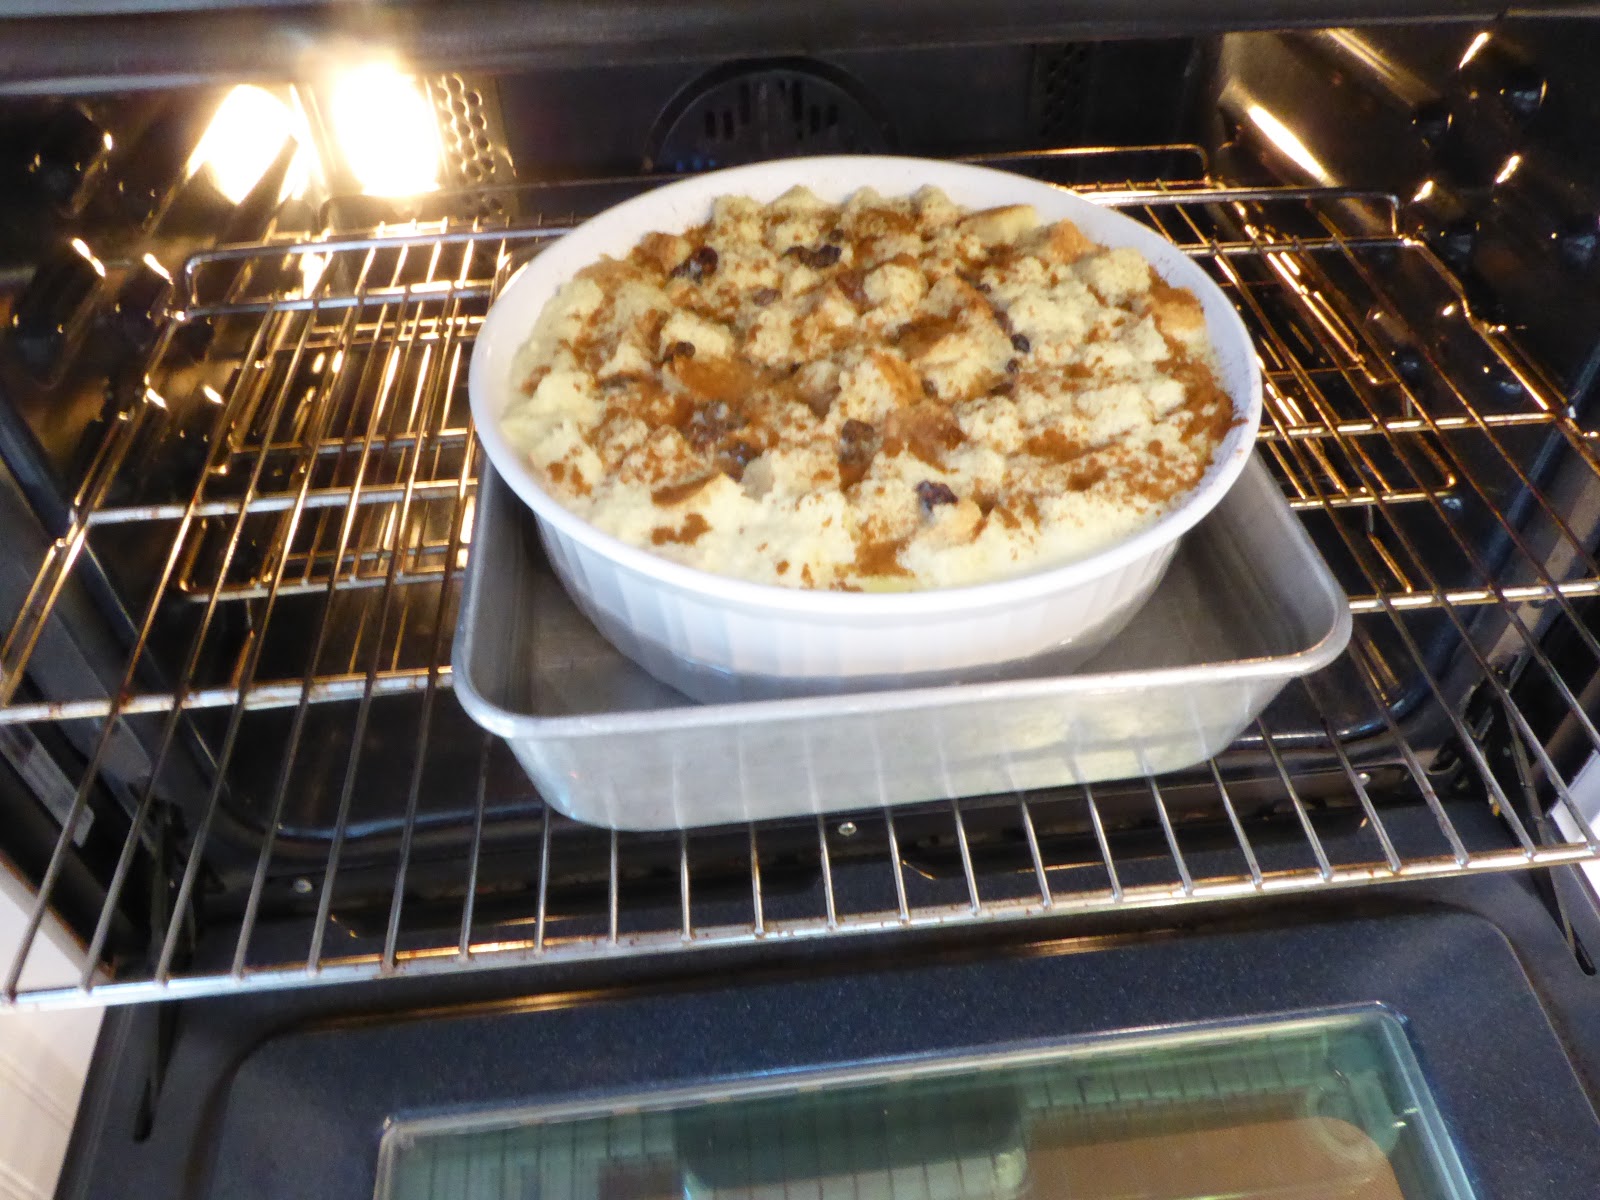
 For our Easter Brunch, I made a Strata from a "Bon Appetit" magazine dated December, 1997.  Over time I have so significantly changed the recipe that now I just call it the "As You Like It Breakfast Strata".   Here's how it looked coming out of the oven.  I should have taken a side shot to show how much this puffed up.  The finished dish was very light and flavorful.


Here's the revised recipe.

AS YOU LIKE IT BREAKFAST STRATA
*  2 cups whole milk
*  1/4 cup olive oil
*  6 cups sourdough bread, cut into 1" cubes
*  1-1/2 cups whipping cream
*  8 large eggs
*  1 tablespoon chopped garlic
*  1-1/2 teaspoons salt
*  3/4 teaspoon black pepper
*  1/4 teaspoon ground nutmeg
*  6 ounces goat cheese, crumbled (about 1-1/2 cups)
*  1 tablespoon chopped fresh thyme (or 3/4 tablespoon dried)
*  1-1/2 teaspoons herbes de Provence (dried)
*  6 cups AS YOU LIKE IT OPTIONS**.  Mix and match to your preference:
    -  mushrooms (shitake, crimini), sauteed in butter or olive oil, cooled
    -  cherry tomatoes, sauteed or roasted with olive oil, cooled
    -  sun-dried tomatoes, cut into pieces
    -  ham, chopped
    -  spinach, fresh chopped
    -  Italian sausage, cooked and cooled
    -  leek, sliced into 1" pieces, sauteed in olive oil, and cooled
    -  artichoke hearts marinated in oil, drained and halved lengthwise
*  1 cup Fontina cheese, grated, packed
*  1-1/2 cups Parmesan cheese, grated, packed

Preheat oven to 350ºF.  Butter a 9x13x2" glass baking dish.  Prepare your "As You Like It Options."  Whisk milk and oil in large bowl.  Stir in bread.  Let stand until liquid is absorbed, about 10 minutes.  Whisk cream, eggs, garlic, salt, pepper and nutmeg in a bowl to blend.  Add goat cheese.  Mix herbs in small bowl to blend.  

Place half of bread mixture in prepared dish.  Top with half of the "As You Like It Options", half of the herbs, and half of the cheeses.  Pour half of the cream mixture over all.  Repeat layering with remaining bread, Options, herbs and cheeses, and finish with remaining cream mixture.

Bake uncovered until firm in center and brown around edges, about 1 hour.

** The options I used in my strata were shitake and crimini mushrooms, roasted cherry tomatoes, and about 2-1/2 cups of artichokes.   So good!!

Monday, April 5, 2021

HAM AND SPINACH ROLLS for Breakfast or Brunch

Today I was thinking about what to have for our Easter Brunch and came across this recipe which I've made a number of times for guests. What makes this a good dish for entertaining is that it can be made a day ahead and refrigerated until it's time to be baked.  It is rather elegant and it always turns out great.


HAM AND SPINACH ROLLS.  Serves 8 to 10.
*  20 oz. frozen chopped spinach, thawed
*  2 cups sour cream
*  1/4 teaspoon ground nutmeg
*  1-1/2 cups packaged cornbread stuffing mix
*  20 thin slices ham (about 1-1/4 #)
*  Cheese sauce (recipe follows)
*  1/2 cup grated Parmesan cheese
1.  Drain spinach in a colander, pressing out moisture.  In a large bowl stir together spinach, sour cream and nutmeg.  Blend in stuffing mix.
2.  Place about 1/4 cup of the spinach mixture on each ham slice, rolling them up and placing side-by-side in a buttered shallow 3-quart baking dish (about 9"x13")
3.  Pour cheese sauce evenly over the ham rolls.  Sprinkle with Parmesan cheese.  If making ahead, cover and refrigerate.
4.  Bake, covered, in a 350ºF oven for 15 minutes.  Uncover and bake until sauce is bubbly and lightly browned (15 to 20 minutes; add 5 to 10 minutes to baking time if made ahead).

CHEESE SAUCE.
Melt 2 tablespoons butter in a medium saucepan over moderate heat.  Stir in 2 tablespoons all-purpose flour, and light 1/8 teaspoon cayenne pepper;  cook until bubbly.  Remove from heat and gradually blend in 1-1/2 cups milk.  Return to heat and cook, stirring, until thickened and bubbling.  Stir in 1 cup shredded sharp Cheddar cheese until melted, then mix in 1 tablespoon dry sherry.  Makes about 2 cups.

Sunday, February 7, 2021

MY FIRST COOKBOOK & "Toad in the Hole" Recipe

 One of the prized possessions of my childhood was my very first cookbook, "Let's Cook With Gail".  There is a bookplate inside the front cover wherein I wrote my name, pre-cursive, in pencil; and since we learned cursive in the second grade, I would have been six or seven when I got this treasured cookbook.


The recipe book was first issued in 1952 by The Farmer, Saint Paul, Minnesota.  The red booklet above was issued at that time.  The beige book with red binding was issued in 1954.  The 1954 version is my first cookbook.

 The Farmer was a newspaper focused on agriculture which began in the late 1800's and has continued following many mergers over the years, to the point that it is no longer recognized by the name.   In 1952, The Farmer began a monthly series of cooking lessons "for boys and girls."  Children received the "Let's Cook With Gail" booklet, and were instructed to cut out the lessons in the newspaper and paste them into their booklet.  Gail was an actual person - the eleven-year-old daughter of Mr. and Mrs. Clarence Palmby, who lived on a general farm in Blue Earth County, Minnesota.


Most of the recipes in the booklet are basic and suitable for all ages.  For fun, I decided to make one of the recipes, "Toad in the Hole."  


Here's the final result.


I liked it!!!   


Wednesday, November 4, 2020

STARBUCKS EGG BITES

I really love the Costco egg bites but I wanted to see if I could find a good alternative to make for myself.   An online recipe search brought up the "Keto Starbucks Egg Bites" which they report "...are an easy DIY version of Starbucks, except they are much better and cheaper."  I've never had a Starbucks egg bite so I can't compare; however, if you make these, and you've had Starbucks, please comment below so all readers will know.    They certainly are easy!  FYI, the recipe below was modified from the original.


STARBUCKS EGG BITES - Makes 12.

*  10 eggs
*  1 cup cheese of your choice, shredded
*  1/2 cup full fat cottage cheese
*  1/2 teaspoon salt
*  Black pepper to taste
*  Herbs of your choice
*  Veggie/Proteins of your choice (pre-cooked and cooled)

Preheat oven to 300º and place a baking dish that is filled with 1 inch of water (a "bain marie") on the bottom rack.  This will create a humid environment and help the eggs cook evenly.  Your muffin tin will be placed in this baking dish.  For example, see the above photo where I used my broiler pan.   Spray a muffin tin with oil.  Cut and pre-cook the veggie/protein of your choice.  Ideas for add-ins include sausage, ham, sun-dried tomatoes, spinach, green onion, bell peppers, asparagus or anything that you like and have on hand.  You won't need much, perhaps a cup or so.  

To a blender add the eggs, cheese, cottage cheese, salt, pepper and herbs.  Blend on high for about 20 seconds.  Pour evenly into the muffin cups.  Then add the veggie/protein ingredients.

Place the muffin pan into the bain marie and bake for 30 minutes or until the center of the egg bites are just set.  Remove from the oven and the bain marie, and let cool 5 minutes.  Gently remove the bites from the muffin tin.

The egg bites can be stored in the refrigerator for a few days, or freeze them for up to 2 months.  Reheat in microwave or a warm oven.


***  Please let me know what you think! ***


Friday, April 12, 2019

EASTER BRUNCH - SAUSAGE-STUFFED FRENCH TOAST

Looking for a delicious, but easy, entree for your Easter brunch?  This is a tried and true recipe, and all of it can be made ahead the day before.


SAUSAGE-STUFFED FRENCH TOAST
Serves 10.
*  1/2 pound pork sausage, cooked and crumbled (I prefer to use hot Italian sausage.)
*  4 ounces cream cheese, softened
*  1/8 teaspoon ground red pepper
*  1 (1-pound) loaf French bread, cut into 1-inch slices
*  8 eggs
*  1/2 cup half-and-half
*  1 recipe Maple-Praline Sauce (See recipe below.)
*  GARNISH:  Toasted, chopped pecans (optional).
     In a medium bowl, combine sausage, cream cheese, and red pepper, stirring well.  Spread mixture evenly over half of bread slices.  Top with remaining bread slices to form a sandwich.  Place in a single layer in a large baking dish.
     In a small bowl, combine eggs and half-and-half, whisking well.  Pour mixture over sandwiches.  Cover and refrigerate for 8 hours, turning sandwiches once.
     Preheat oven to 400 F.  Grease a rimmed baking sheet.  Place sandwiches in a single layer on prepared baking dish.  Bake for 20 minutes.  Serve with Maple-Praline Sauce.

MAPLE-PRALINE SAUCE  - Yield:  Approximately 1-1/2 cups.
Can be made ahead and reheated/microwaved for serving.
*  1/2 cup butter
*  1/2 cup firmly packed brown sugar
*  1/2 cup maple syrup
     In a medium saucepan, melt butter over medium heat.  Add brown sugar and syrup.  Bring to a boil, reduce head, and simmer for 2 minutes.  Watch carefully or the butter will separate.  Serve warm.

Recipe adapted from:  Christmas Cooking Southern Style

Tuesday, January 29, 2019

VALENTINE'S DAY TREAT!

When I saw this magazine cover...


… I was reminded that I had some left-over puff pastry in the refrigerator that needed to be used.  What a simple idea:  

RECIPE:  Slightly roll out the pastry, cut into squares, cut hearts out of the center of half of the squares, add jam (in this case, blackberry jam) to the center of the non-heart square, brush the rim on the same square with an egg wash (one egg, a bit of water, whisked) so that the pieces stick together, top with the heart square, stretching a bit to match all edges, use a fork to press the two pieces together, brush the top with the egg wash, and bake for about 12-15 minutes in a 425ºF oven.  


This is how much one sheet of puff pastry makes.

Voila!  These Valentine Treats are ready to eat!  Made them yesterday...all gone today.  


Just in case you're wondering, the recipe in "Better Homes & Gardens" uses regular pie pastry - NOT puff pastry as I've done here.  In all events, this is a pretty and simple use for left-over pastry!

Monday, April 9, 2018

TOMATO, BASIL & GOAT CHEESE BREAD


Today's recipe came to me from my step-son's mother-in-law, who I am pleased to say has become a cherished friend of mine, despite living far away in England.  The photo below is her photo, and the recipe comes from the blog, A Year in Redwood.  I signed up to get this blog's posts, since I see that they have an airbnb accommodation in North Tipperary, Ireland.  I'd love to stay there sometime!.  


TOMATO, BASIL, GOAT CHEESE BREAD
·         4 oz butter, plus extra to grease tin
·         11 oz self-raising flour (Note 1, below)
·         1/2 tsp salt and lots of black pepper
·         6 oz goat’s cheese, diced (there is no need to remove the rind) (We didn’t have the full amount of goat’s cheese so used some Philly to make up the balance)
·         6 oz firm cherry tomatoes, halved
·         15 g basil
·         3.5 oz milk
·         3 eggs (2 duck eggs)

Heat oven to 180 C/ 160C Fan/ Gas 4 (Note 2, below).  Butter and line a 900 g loaf tin with baking parchment.
Tip the flour and seasoning into a bowl, then rub in the butter until it disappears.  Toss in 100 g each of the cheese and tomatoes.  Roughly tear in the basil, keeping the pieces quite large.
Beat the milk and the eggs together, then quickly stir into the flour and tomato mixture.  Turn into the tin, smooth the top, then scatter with the remaining cheese and tomatoes.
Bake for 45 – 50 minutes or until golden and a skewer inserted into the loaf comes out clean.  (Make sure it isn’t the melting cheese you are looking at rather than the bread mixture).
Cool before slicing.
Serve in thick slices.  Store in the fridge for up to 2 days.


NOTES:
1)  For information about making your own self-rising flour (requiring only all-purpose flour, salt and baking powder), follow this link.   Additional information is also available that may be of interest to you.  Also, 11 oz of self-rising flour is equivalent to a light cup and one-half.

2)  Since I haven't made this, I'm unsure what the best baking temperature might be.  I would try it at 325ºF; but watch it carefully.

Sue said that they ate this with soup.  Salad would be another good option.

I look forward to making this!  When I do, I'll follow up with more specific details/conversions.

Monday, March 5, 2018

BANANA BREAD

Perhaps you tried my mother's recipe for bread pudding that I posted a few days ago.  Today I'm posting my mother's recipe for banana bread.  I know, there are a gazillion recipes for banana bread.  I expect that my mother had many other recipes as well since she shared this recipe as her "favorite."  I also have many recipes for banana bread with notes such as "greasy" or "dry" or "bland".  These are all reasons why you should try this particular recipe.  Not only does the recipe result in banana bread that is moist and flavorful, it is flexible, as noted in the recipe.


As I emptied this bag of flour I noticed that a recipe for banana bread was printed on the package.  Even though I think my mother's recipe may be better, I'll probably go ahead and make this one, just out of curiosity.  If I do, I'll try to remember to blog here about it.  

The question is:  Why do I keep trying so many different recipes for the same thing, when I already have the perfect recipe?!?  

As an aside, Gold Medal flour is America's #1 selling flour brand - originating over 135 years ago... in Minneapolis, Minnesota!  


MOM'S BANANA BREAD
*  1/2 cup soft butter
*  1 cup sugar
*  2 eggs, large
*  1-1/3 cups mashed bananas (about 4 bananas)
*  1 tablespoon milk
*  1 teaspoon vanilla
*  2 cups flour, all purpose
*  1 teaspoon baking soda
*  1/4 teaspoon salt
*  1/2 cup chopped nuts (optional:  chocolate chips)
*  1/2 cup quartered maraschino cherries (optional:  chocolate chips)
Preheat oven to 350º.  Grease a 9"x 5" loaf pan.
In a large bowl, cream butter and sugar;  beat in eggs.  
Combine mashed bananas with milk and vanilla.
In a small bowl, mix flour, soda and salt together; blend it into the banana mixture.
Stir in nuts/cherries/chocolate chips.  Pour into loaf pan and bake for about 50 minutes, or until a toothpick inserted in the center comes out clean.


Notice the very, very ripe bananas.  The two in the bag came out of the freezer.  They look awful, but they are perfect for a flavorful bread.   Tip:  When you have overripe bananas, instead of tossing them, peel them, put them in a baggie, and store them in the freezer for making banana bread.


Here are the three mixtures: 1) dry ingredients in the small bowl, 2) creamed sugar and butter, with eggs ready to be beaten in, and 3) wet ingredients - bananas, milk and vanilla.


Tip:  As you can see in the photo below, I should have put on gloves before cutting the maraschino cherries.  Oh well...


TA DA...  Ready to eat!  Actually, this was cut when the bread was hot out of the oven.  Tip:  Once the bread cools, it sets up and will cut perfectly.  


Of course, you probably don't need suggestions for eating banana bread BUT consider this:  Toast a slice of banana bread, top with a scoop of ice cream of your choice, and top with hot fudge sauce.   Really, really good!

Wednesday, February 28, 2018

BREAD PUDDING - MY FAVORITE RECIPE

It is understandable that the foods we were raised on remain our comfort foods, our all time favorites.  Bread pudding is that for me.  Although I frequently order it for dessert in restaurants, I am also routinely disappointed.  Typically the pudding is too bready or too sweet.  My mother's recipe for bread pudding results in a creamy, smooth custard, and just the perfect amount of sweet.  It is wonderful!  Today I share this recipe with you, and I hope that somewhere along the line a chef picks up the recipe and gives it a try.  It is quite a contrast to restaurant "bread pudding."


MOM'S BREAD PUDDING.
Butter a casserole/souffle dish.  Preheat oven to 350º.  In a large bowl whisk together:
*  6 eggs, large
*  ½  cup sugar
* ¼ teaspoon salt
Scald: 4 cups whole milk (or a mix including ½&½); 
Add:  1½ teaspoons vanilla (plus optional:  ½ teaspoon cardamom)
Then whisk it into the egg mixture.  
Add:  
*  4 cups of cubed bread*
*  ½ cup raisins/currents (optional)
Let rest a few minutes in order for the bread to soak up the egg mixture.  Pour all into the prepared casserole dish.  Sprinkle top with cinnamon.

Set casserole dish in a bain marie** and bake at 350º for about an hour, until a knife inserted in the center comes out clean.

Refrigerate as soon as possible to avoid separation of the custard.


 NOTES:____________
*  Throughout the year I dry out left over bread and save it in a metal tin.  That way, I always have what I need to make croutons, dressing/stuffing, bread crumbs for coating fish, and for bread pudding.  Of course, having fresh left over bread is a good excuse to make bread pudding!

**  bain-ma·rie
ˌbanməˈrē/
noun
  1. a container holding hot water into which a pan is placed for slow cooking

Sunday, December 11, 2016

QUICHE AS YOU LIKE IT!

It is unusual for me to use a purchased pie crust when I always have everything on hand to make a crust.  That said, I was recently at Aldi and bought frozen pie crust at a ridiculously low price, with two in the package.  I used one for my Thanksgiving pumpkin pie, and decided to use the other for a quiche.  

Quiche is one of the easiest things to make, particularly when you can use a frozen pie crust!  The beauty of this recipe is that it can be made to use what you have on hand, to suit your own taste.  Naturally, if you use all ingredients you love, you will love the final result.  

For this quiche, I used fried hot Italian sausage (previously fried up, then frozen), a mix of vegetables consisting of onions, minced garlic, sweet yellow pepper, and a seeded Roma tomato, and about a tablespoon of dried herbes d'Provence.   Here is a pic of Kevin fixing his breakfast.


QUICHE AS YOU LIKE IT.  Serves 6 - 8.
*  1 - 9" unbaked deep-dish pie shell
*  1 cup cooked meat, of your choice
*  1 cup vegetables, of your choice
*  1 cup shredded cheese, of your choice
*  6 eggs
*  1 cup milk or cream
*  1/2 teaspoon salt
*  1/4 teaspoon pepper
*  Fresh/dried herbs, garlic, chive, or other seasonings of your choice
Sprinkle cheese, meat and vegetables evenly on the bottom of the pie shell.  Beat together eggs, milk, salt, pepper and other seasonings until well blended.  Pour into pie shell.  Bake in preheated 375º oven for 35 - 40 minutes or until knife inserted halfway between center and outside edge comes out clean.  Let stand 10 minutes before serving.  


Friday, March 4, 2016

RHUBARB BUNDT CAKE

In no time at all my rhubarb plants will throw off the snow, shoot out of the ground, and be ready for harvesting.  That means it is time for me to pull the remaining batch from last season out of the freezer and use it.  With that in mind, I decided to make a rhubarb bundt cake.  Unfortunately, I had no recipe and was unable to find a recipe on-line that I thought would yield what I was looking for.  Did that stop me?  NO!  In fact, I feel very good about the cake that resulted!  


RHUBARB POPPY SEED BUNDT CAKE.  Serves 10 to 12.
*  1-2/3 cups sugar
*  5 eggs
*  1-1/4 cups butter at room temperature
*  2 tablespoons Creme de Cassis (a sweet, dark red liqueur made from blackcurrants)
*  2-1/2 cups all-purpose flour
*  1-1/2 teaspoons baking powder
*  3 cups rhubarb cut into 1/2" pieces
*  3 tablespoons poppy seeds
*  Powdered Sugar sprinkled on top
Preheat oven to 325º.   Use shortening to grease, and then flour, bundt pan.
Add sugar and eggs to electric mixer bowl and blend well.  Add the butter and Creme de Cassis and beat mixture until it is light and fluffy.  In a separate bowl, whisk together the flour and baking powder.  Slowly add flour to the mixture, continuing to beat until the batter is smooth and the flour is incorporated.  Fold in the rhubarb and poppy seeds.  The batter will be quite thick.  Add cake batter to the prepared bundt pan and bake until a toothpick inserted in the center comes out clean, about 1 hour and 10 minutes.  Remove from oven, let rest 15 minutes, then remove from pan onto a wire rack to finish cooling.  Dust with powdered sugar and enjoy!

This makes a delicious breakfast!


Monday, September 28, 2015

THE BEST APPLE BREAD! Apple Measurement.

GREETINGS FRIENDS!

A delightful gift from a talented friend.
 Before I get into the details for the Best Apple Bread... EVER!!!, I have a little tip for those of you who cook with apples and have difficulty with certain recipes that call for using a specific number of apples.  You know what I mean.  When a recipe calls for, for example, three apples, precisely what does that mean when you are using apples from the tree in your back yard.  They may be little apples, or bruised apples, or .... simply not the big, beautiful apples we see in stores.  The apples that I use are "organic" which means that there is a lot of waste.  So, when a recipe calls for "three apples" I have no idea what is meant.  Well, here's the answer...

As a general rule, 1 pound of apples is equal to 4 small apples, or 3 medium apples, or 2 large apples.  And, 1 pound of apples is equal to 3 cups of prepared apples (peeled, cored and diced).

I hope this makes it easier for you to bake using apples.


Now, on to The Best Apple Bread!

APPLE BREAD.  Makes 2 large loaves.
*  4 cups apples, peeled, cored and chopped
*  4 large eggs, beaten
*  1 cup vegetable oil
*  2 teaspoons vanilla extract
*  2 teaspoons baking soda
*  2 teaspoons salt
*  2 teaspoons cinnamon
*  3 cups all-purpose flour
*  2 cups granulated white sugar

Streusel Topping.
*  3/4 cup all-purpose flour
*  1/4 cup granulated white sugar
*  2 teaspoons cinnamon
*  1/2 cup butter ( 1 stick)

Preheat oven to 350º.  Grease two standard bread loaf pans and set aside.  Peel, core and slice the apples.  Cut into good-sized chunks, about 1 inch in size.  In a large bowl, beat the eggs with an electric mixer until fluffy.  Add the oil and beat until combined.  Add the vanilla, baking soda, salt and cinnamon.  Beat until thoroughly mixed.  Add the flour and sugar and mix on low just to blend.  Turn the mixer to high and beat until mixture is smooth.  The batter will be very thick.  Fold in the chopped apples, being careful to not break them.  Divide the mixture between the two pans.  To prepare the topping, combine flour, sugar and cinnamon in a small bowl.  Cut the butter into the mixture until all ingredients are moist and crumbly.  Sprinkle equal amounts of topping on each loaf.  Bake for about 1 hour on the center rack of the oven.  The loaf should feel fairly firm when touched in the middle; if not, bake an extra 5 minutes.  Remove pans from the oven and cool on a rack for 5-10 minutes.  Finally, remove the bread from the pans and completely cool.  


Pans greased and ready to go!

Folding apple chunks into the batter.

Making the streusel topping.

Ready to go into the oven.
The final result is a very dense, deeply flavorful apple bread.  Store in the refrigerator, cut a slice, and heat it a few seconds in the microwave oven to bring out the flavors.  You won't even need butter!!

Monday, April 13, 2015

RHUBARB GRAHAM MUFFINS

My rhubarb plants are beginning the season with new growth, which means that in no time at all I'll have a fresh harvest of rhubarb.  The thing is, though, I still have rhubarb in the freezer from last year that needs to be used up!  With that in mind (and, of course, with my unlimited craving for sweets), I decided to make:


RHUBARB GRAHAM MUFFINS.  Makes 12.
*  1-1/4 cups finely crushed graham crackers (1 sleeve of crackers)
*  1 cup flour
*  1/2 cup packed brown sugar
*  1 teaspoon baking powder
*  1/2 teaspoon baking soda
*  1/4 teaspoon salt
*  1 egg, beaten
*  1/2 cup buttermilk (see note below)
*  1/3 cup canola oil
*  3/4 cup chopped rhubarb (okay to add frozen)
*  1/3 cup shredded sweetened coconut  
    Preheat oven to 375º.  Coat muffin cups with cooking spray or line with paper baking cups.
    Whisk together cracker crumbs, flour, brown sugar, baking powder, baking soda, and salt.  In a small bowl, stir together the egg, buttermilk, and oil.  Add to dry ingredients and stir until just moistened.  Fold in rhubarb and coconut.  Fill muffin cups two-thirds full.  Bake for 18 to 20 minutes, until golden.


As you can see, it would be hard to find a simpler recipe!  These turned out light, moist and delicious.  They also held up well in the refrigerator.

Note:  Buttermilk substitute = Put 1/2 tablespoon of white vinegar or lemon juice in a 1/2 cup measure.  Add milk to fill 1/2 cup.  Let stand for 5 minutes before using.

Source:  Rhubarb Renaissance by Kim Ode

Monday, June 9, 2014

RHUBARB HONEY MUFFINS

Here we are again, Springtime, and lots of rhubarb!  So far this season I've made Strawberry-Rhubarb Pie, Rhubarb base (for making fun martini drinks), Rhubarb bread and RHUBARB HONEY MUFFINS, the recipe for today.  I made these for a potluck and they turned out perfectly!  

RHUBARB HONEY MUFFINS.  Makes 22 - 24.
*  2-1/2 cups all-purpose flour
*  1 teaspoon baking soda
*  1/2 teaspoon salt
*  1 egg, beaten
*  1 cup brown sugar, packed
*  2/3 cup corn/vegetable oil
*  1/2 cup honey
*  1 teaspoon pure vanilla
*  3/4 cup buttermilk (or substitute 1 tablespoon plain vinegar plus milk to make 3/4 cup)
*  1-1/2 cups fresh rhubarb, finely chopped
*  1/2 cup pecans, chopped
Topping:  Mix the following ingredients together until crumbly
*  1 tablespoon butter
*  1/2 cup granulated sugar
*  cinnamon
Preheat oven to 350º.  Line muffin pans with cupcake papers.
In a large bowl, mix all dry ingredients (flour, baking soda & salt).  In another bowl, stir egg, brown sugar, oil, honey, vanilla extract and buttermilk until blended;  stir into flour mixture just until moistened.  Fold in rhubarb and pecans.  Fill muffin cups about 3/4 full.  

Sprinkle tops with butter-sugar mixture.  Bake 25-35 minutes or until golden.  Remove from pan; cool on a rack.


Smear with butter and ENJOY!!!!

Thursday, April 3, 2014

IRISH SODA BREAD

I'm a bit late for a St. Pat's Day staple, but Irish Soda Bread works well year round, and the beauty of it is that it is made with ingredients that are found in most kitchens, and it comes together very quickly.  Also, there is almost nothing better than home baked bread, fresh from the oven, slathered in butter!  


Irish Soda Bread is unique to Ireland.  It came into existence in the 1840's when bicarbonate of soda was first introduced to Ireland.  Bicarbonate of soda is used to leaven bread in lieu of yeast and kneading.  Using simple ingredients, even the poorest families could have bread at mealtimes.  Whole wheat or white flour, baking soda, salt and buttermilk were the basic ingredients.   Irish immigrants who prospered in America began to add eggs, sugar, raisins and other ingredients.   The following recipe results in a delicious and quick Irish Soda Bread.

IRISH SODA BREAD.
*  4 cups all-purpose flour
*  1 teaspoon baking soda
*  2 teaspoons baking powder
*  1 teaspoon salt
*  1/4 cup white sugar
*  2 eggs
*  1-1/4 cups buttermilk (See note below.)
*  1/4 cup vegetable/corn oil
*  1 cup raisins (optional)
Preheat oven to 350ºF.  Prepare baking sheet using silpat, parchment paper, or grease.  In a large bowl, stir together all dry ingredients (flour, soda, baking powder, salt and sugar).  In a small bowl, stir together the wet ingredients (eggs, buttermilk and oil).  Make a well in the center of the dry ingredients, pour in the buttermilk mixture; add the raisins if using; then stir all just until everything comes together.  Do not over-mix or the dough will become tough.  Turn the dough out onto a floured surface, and with floured hands shape the dough into a ball.  Place it on the baking sheet, and cut a large cross in the top with a sharp knife.  Bake until golden brown, about 30 to 40 minutes.

The Irish were historically quite religious.  The cross cut in the top of the dough was made to ward off the devil and to protect the household.   I found that it resulted in a bread that was properly baked, inside and out. 

If you do not have buttermilk on hand, just add 1 tablespoon of white vinegar to a cup of milk and allow it to stand for 10-15 minutes.  Alternatively, if you are in a hurry, simply microwave the mixture for about 30 seconds. 

The end result is a somewhat sweet, somewhat dense bread.  I haven't seen it sold locally, but who cares?!?  I can make it myself, and so can you!  

Saturday, March 29, 2014

SAVANNAH - CREAMY SHRIMP AND GRITS

Once a year for the past 14 years a group of eight friends (including us!) have been going on a weekend trip together.  We cook, we shop, there may be golf, there may be a dinner game mystery; but we have really enjoyed the fun time together.  The location has typically been within a two hour drive of our homes, to a VRBO, a bed and breakfast, or to a lake cabin or lake home.  Since this year we are celebrating our 15th get together, we decided to do something special.  After a lot of thought, we decided to spend four (or more!) days together in Savannah, Georgia.  Although we are all well traveled, we found that this is one of the places that none of us had been to previously.  More on that in a later blog post.

We needed to get together to do some advance planning, so I decided to host a potluck "Southern Dinner" to include us watching the movie "Midnight in the Garden of Good and Evil" which takes place in Savannah.   For the dinner I decided to prepare Shrimp and Grits.  You can immediately tell that I am a northerner since southerners will tell you that Shrimp and Grits is a breakfast entree, not a dinner entree.  Oh well...


CREAMY SHRIMP AND GRITS.  Serves 8.
GRITS:
*  4-1/4 cups low-salt chicken broth
*  3/4 cup whipping cream
*  6 tablespoons butter
*  2 garlic cloves, minced
*  1 cup corn grits (or corn meal)
In a large heavy saucepan, bring broth, cream, butter and garlic to boil.  Gradually whisk in corn grits.  Return to a boil, whisking constantly.  Reduce heat to low and simmer, uncovered, whisking often, until grits thicken - about 15 minutes.
SHRIMP:
*  4 ounces of bacon, cut into thin strips
*  1/2 cup butter
*  1 whole fresh red pepper, seeded and cut into pieces
*  2/3 cup finely chopped shallots
*  2 large garlic cloves, minced
*  4 pounds uncooked large shrimp, peeled, deveined and tails removed
*  1 cup dry white wine
*  28 ounces canned, diced tomatoes in juice, drained (juice reserved)
*  1 teaspoon seasoning such as Penzeys "Ozark"
*  1/2 cup chopped fresh parsley
*  1/2 cup chopped green onions

In a large, heavy skillet, fry the bacon; then remove the bacon and most of the bacon grease.  Add 1/4 cup butter to the skillet.  Saute red pepper, shallots and garlic for about 2 minutes.  Add the shrimp and saute another two minutes.  Using a slotted spoon, remove the shrimp to a bowl.  Add white wine to the skillet and boil until reduced to a glaze, about 5 minutes.  Add the drained tomatoes, the Ozark seasoning, and half of the fried bacon; simmer until slightly thickened, about 2 minutes.  Add parsley, green onions, and cooked shrimp and simmer until the shrimp are warmed through, about 2 minutes.  If desired, thin the sauce with the reserved tomato juice.  Test and add salt and pepper to taste.
TO SERVE:
Spoon corn grits into shallow bowls.  Top with shrimp mixture, and garnish with the remaining fried bacon.  Serve immediately. 

Friday, November 8, 2013

COLD BREWED COFFEE...SO SMOOTH AND RICH!

A good friend of mine has been making cold brewed coffee for years and I have always enjoyed having coffee at her home.  For ages I've been saying that I'm going to start making coffee her way and I finally did! Now I will never go back to hot drip coffee; cold brewed is significantly more smooth (non-acidic), and has a deep coffee flavor.

To begin, I went to Amazon.com and bought the "Toddy Cold Brew System" which cost about $35 with extra filters.

The Toddy System comes with the white brew container, 2 rubber plugs for the bottom of the brew container, the carafe and its lid.
 The System that I purchased also came with extra filters.


Of course, coffee should be made to taste and if you try out this system (which I hope you will!), you will want to adjust the amounts of coffee and water to suit your own taste.  Here is my "recipe."

1.  Place the plug in the bottom outside of the Toddy brewing container.
2.  Place the filter in the bottom inside of the container.
3.  Into the container pour one cup of fresh cold water.
4.  Coarsely grind just under 3 cups of coffee.  We use Kirkland/Costco brand coffee.  Pour the coffee into the container, gently leveling out the top.
5.  Gently and slowly drizzle 3 cups of fresh cold water over the coffee grounds in a circular manner, wetting the entire surface.
6.  Coarsely grind another slight 3 cups of coffee and pour it into the container, gently leveling out the top.
7.  Wait 5 minutes, then gently and slowly drizzle 4 cups of fresh cold water over the coffee grounds.

Here is what it will look like:


8.  Leave this on your countertop and wait 24 hours for the coffee to steep.
9.  Remove the lid from the carafe and place the brew container just above the carafe, pull the plug from the bottom of the brew container in order for the coffee to drip into the carafe.   It will take about an hour for all of the coffee to drip into the carafe.


Here the water has run out of the brew container, leaving only the grounds.  These go into my garden beds!


The coffee now in the carafe is actually a coffee CONCENTRATE.  To make coffee from the concentrate pour about 1/4 cup of the concentrate into your coffee cup, then add boiling water to the concentrate for a rich, flavorful cup of coffee.  I have found that one carafe of the concentrate makes about 32 cups of coffee.
Here are some of the benefits of cold brewed coffee:
1.  It's about 67% less acidic than hot brewed coffee, and you can distinctly notice the difference.
2.  The coffee has a deep, rich flavor.
3.  Making coffee for me is a once-a-week endeavor rather than a daily production.
4.  My husband drinks fully caffeinated coffee and I drink decaf.  Making a carafe of decaf for me and a carafe of caffeinated for him means we are both drinking the coffee we prefer, no compromises.
Thus, the Toddy cold brew system gets four thumbs up in this family!